Adding a blog to an existing website sounds like a five-minute task until you actually start. Your CMS has a publishing section somewhere—maybe it’s obvious, maybe it’s buried under three menus—and getting from a blank screen to a properly structured blog with categories, a working RSS feed, SEO-friendly URLs, and posts that actually look the way you want them to takes a bit more setup than clicking “New Post.”
The process varies significantly depending on which platform you’re using. Some CMS platforms have blogging built in as a core feature with everything ready to go. Others treat the blog as an add-on module you configure separately. A few require you to set up a content type first, connect it to a template, and wire up the URL structure before a single post goes live. None of this is particularly difficult, but skipping steps early tends to cause reorganization headaches later.
This guide walks through what the blog setup process looks like on the most common platforms, what to configure before you publish anything, and how to structure your content from day one so you’re not rewriting your URL schema six months in.
Before You Create Anything: Decisions That Are Harder to Change Later
A few setup choices made before your first post are much easier to get right upfront than to fix after you’ve published a hundred articles.
- URL structure matters for SEO and for your own sanity. The default slug format on most CMS platforms is
/blog/post-title, which is fine. What you want to avoid is the dated format/2024/08/10/post-title, which locks every URL to a specific date and makes evergreen content look stale. Set your permalink structure before publishing, because changing it afterward breaks every URL that has already been indexed or linked to. - Category and tag hierarchy should be planned, not improvised. Starting without categories means everything lands in Uncategorized and you’ll spend time retroactively sorting posts into a taxonomy you’re making up as you go. Decide on five to eight broad categories that cover everything you plan to write about, create them before your first post, and assign every article to at least one before it goes live.
- Author profiles and contributor permissions should be set up if more than one person will be publishing. Most CMS platforms have role-based access—editor, contributor, author—that lets you control who can publish without review versus who needs approval. Getting this right at the start means you’re not handing full admin access to a freelance writer because it was the path of least resistance in week one.
How to Set Up a Blog on the Most Common Platforms
WordPress — Built-In Blogging With Full Control
WordPress has blog functionality built into the core. Posts, categories, and tags exist from the moment you install it—there’s nothing to configure to get the basic structure running.
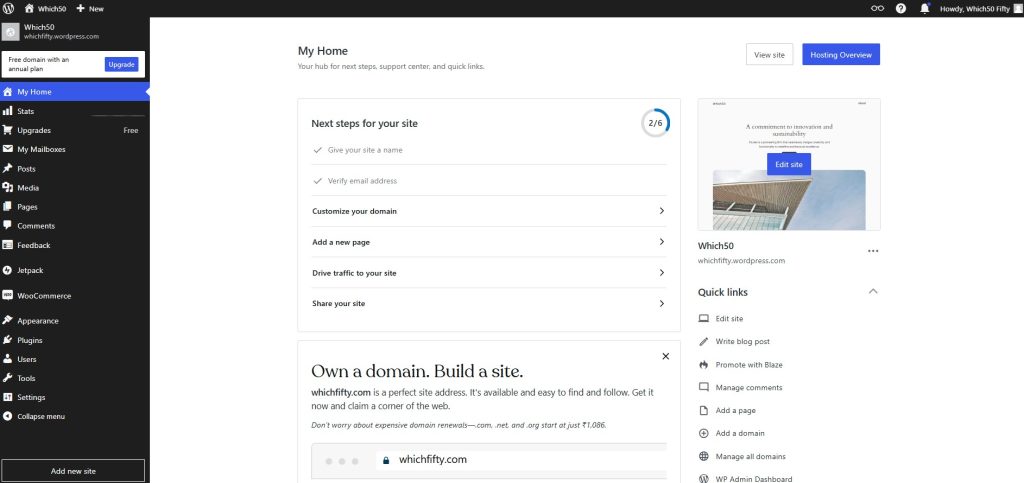
The setup decisions are in the details. Go to Settings → Permalinks and choose Post Name as your URL structure before publishing anything. Create your categories under Posts → Categories and draft your tag vocabulary at the same time. Install an SEO plugin like Yoast or Rank Math immediately—these add the meta description field, robots settings, and sitemap generation that WordPress doesn’t include by default. Set your Reading settings to ensure the blog index page is pointing to the right location, especially if your homepage is a custom landing page rather than a post feed.
For the design layer, your blog listing and single post templates are controlled by your theme. If the default theme doesn’t match what you need, switching themes before you have published content is significantly easier than redesigning after the fact.
Ghost — Blogging as the Default Mode
Ghost doesn’t treat blogging as a feature you add—it’s the entire structure of the platform. When you create a Ghost site, you have a blog. The question is just how you configure it.
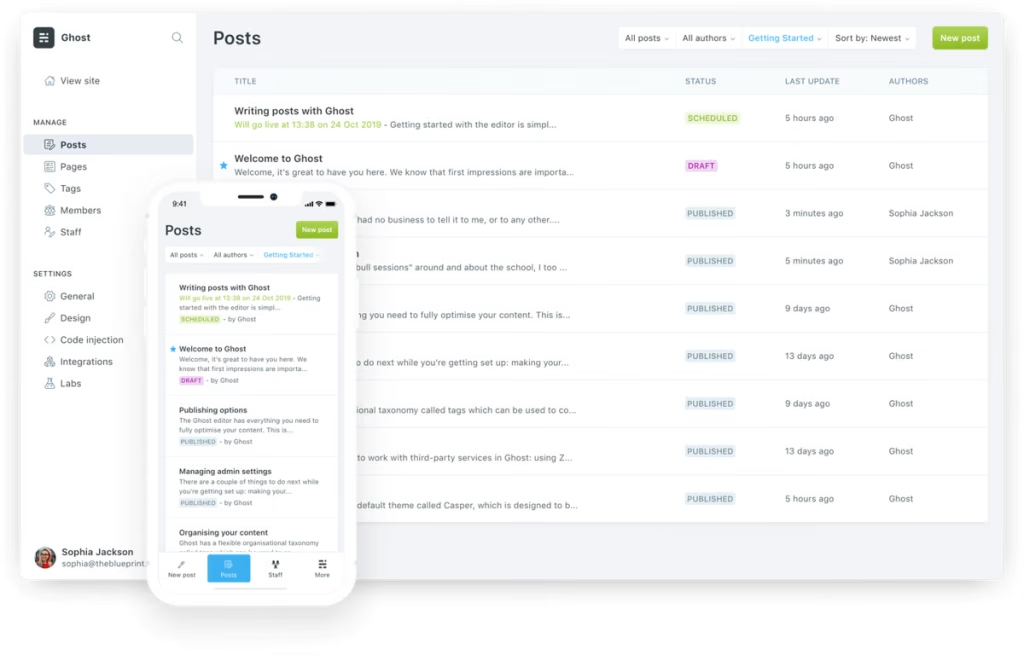
The setup process is straightforward: go to Settings → Design to choose your theme, then head to Tags to set up your content taxonomy. Ghost uses tags in place of traditional categories, so your first task is creating the tags that map to your content pillars and then assigning them consistently from the first post. Ghost also has primary tags, which function like a category—the primary tag on each post determines which section of the site the post appears under if your theme supports section-based navigation.
For SEO, Ghost handles the basics natively: canonical URLs, meta titles, descriptions, Open Graph tags, and a sitemap are all built in without plugins. The publication settings let you set your blog title, description, and social sharing metadata in one place.
HubSpot — Blog Setup Inside a Marketing Ecosystem
HubSpot creates the blog through its CMS Hub. Once you’re in the portal, you name the blog, pick a URL root, and select a template for your post listing and individual article pages—straightforward stuff.
The part that makes HubSpot’s setup worth the extra steps is what comes bundled in. Every post editor includes keyword suggestions, a social preview, and a meta description panel without needing a separate plugin. Visitors can subscribe directly from the blog index page. And if you’re already running HubSpot’s CRM, post views and signups attach automatically to your contact records—so you can see exactly which articles your leads are actually reading before a sales call.
Webflow — Blog Setup Through the CMS Collection System
Creating a blog in Webflow requires a different mental model than traditional CMS platforms. There is no built-in “Blog” button—instead, you create a CMS Collection called “Blog Posts” and define the fields that every post will contain: title, slug, body content, featured image, author, categories, and any custom fields your design needs.
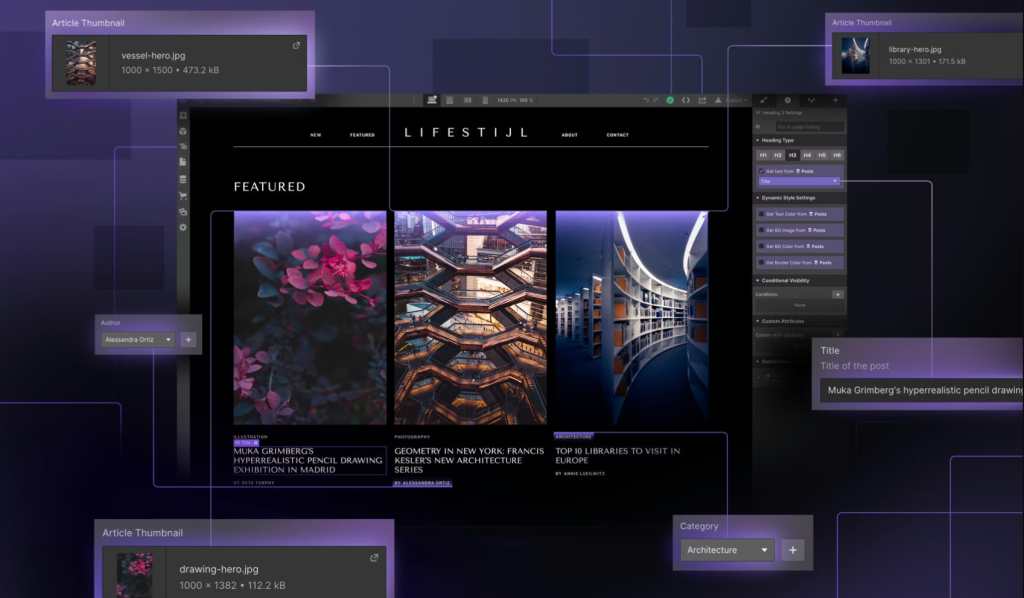
Once the collection is created, you design the collection template page—this is the single-post layout that every new blog post will inherit automatically. Then you design the collection list page—the blog index that renders a list of posts from your collection. It’s more setup work upfront than platforms with blogging baked in, but the payoff is that every visual detail is exactly what you designed, and adding a new post means filling in fields, not wrestling with a page builder.
Set your slug format in the collection settings and connect your blog index to your main navigation before publishing. Webflow’s CMS also supports nested categories if your taxonomy is more complex than a flat tag list.
Squarespace — Blog as a Built-In Page Type
Squarespace treats a blog like any other page on your site. Head into Pages, add a new page, and pick Blog from the page type options. Your theme takes over from there—the index and post layout are generated automatically without any template configuration on your end.

Set up your categories in the blog page settings before you start writing. Squarespace takes care of the SEO basics on its own: post URLs are pulled from the article title, meta tags and Open Graph data are generated without you touching any code, and mobile performance is handled out of the box.
If other people will be writing for the blog, Squarespace’s Contributor role is the clean way to handle it. Guest writers get access to draft and submit posts without ever seeing your site settings, billing panel, or anything else they shouldn’t touch.
Wix — Blog Setup Through the Blog App
Wix runs its blog through a built-in app. Templates that include a blog will have it already wired up. If yours doesn’t, just add it from the Apps section in your dashboard under Wix Blog.
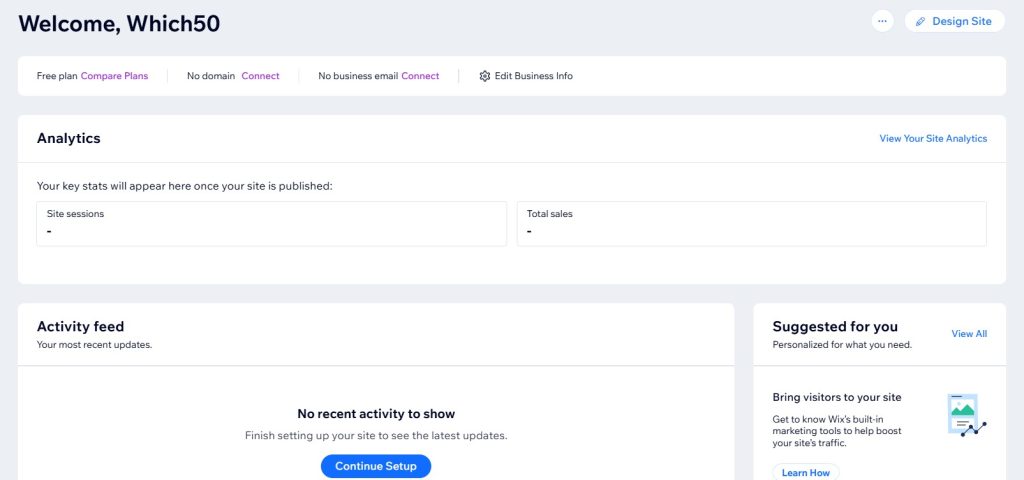
From there, you set up categories, lock in your URL structure, and tweak how your blog feed and post pages look through the visual editor. SEO fields—title, meta description, robots—are set individually on each post from a dedicated panel, so you’re not relying on blanket site-wide defaults.
On the contributor side, Wix lets you bring in multiple authors, assign roles, and set up draft approval and scheduling without needing anything outside the platform.
What to Do Before Publishing Your First Post
Regardless of which platform you’re on, the same checklist applies before anything goes live.
- Set your URL structure and test a sample slug before publishing. Change it now. Changing it after means broken links everywhere.
- Create your category structure and add at least one category per post from the start.
- Connect an analytics tool. Google Analytics or your platform’s native analytics need to be running before your first post so you have baseline traffic data from day one.
- Write at least three posts before launching the blog publicly. A blog with one post looks like an abandoned project. Three gives visitors something to read and signals that the publication is active.
- Set your meta description and OG image fields on every post before it publishes. These two fields control how your article appears in search results and when shared on social media. Default them to something intentional, not blank.
Conclusion
Getting a blog set up on your CMS is mostly a series of configuration decisions rather than technical heavy lifting. WordPress gives you full control with the most flexibility. Ghost makes blogging the default with SEO built in from the start. HubSpot connects your blog directly to your marketing and CRM stack. Webflow rewards teams who want complete design control over every post layout. Squarespace and Wix keep the setup fast for teams that don’t need deep customization. Pick the platform that matches how your team publishes, make the structural decisions before your first post goes live, and the blog will be easier to maintain at scale than if you treat setup as something to figure out as you go.

Leave a Comment