We’ve all done the volume dance. You start a new video or podcast, and the intro music blasts your eardrums. You panic, turn the volume down, and then the host starts speaking in a quiet whisper. So you crank the volume back up. Two minutes later, a loud laugh hits and you’re deaf again.
Honestly, it’s exhausting. And most people won’t put up with it—they’ll just click away and find something else to listen to.
If you’re making videos, podcasts, or tutorials, keeping your volume consistent is the easiest way to sound like a professional. The fix is called audio normalization. It’s a simple, set-and-forget editing trick that keeps your levels even from start to finish. Let’s walk through how to do it without getting bogged down in technical jargon.
What Is Audio Normalization?
Simply put, normalizing is just automatic volume control for an entire file. Instead of going through sentence by sentence to manually tweak the volume, you let the software boost or cut the entire track uniformly.
You’ll generally run into two types:
- Peak Normalization: This looks for the single loudest point in your file and raises or lowers the entire track based on that spot. If your loudest scream hits -6 decibels (dB) and you want it at -1 dB, the software boosts everything by 5 dB.
- Loudness Normalization: This is the smart option. It ignores single spikes and looks at the average volume of the track based on how human ears actually hear. This is measured in LUFS (Loudness Units Full Scale).
LUFS might sound like technical jargon, but it’s what keeps your volume levels steady when switching between different tracks on Spotify or videos on YouTube. It measures how loud a track actually feels to a human ear, not just the technical spikes in the file. Even the Audio Engineering Society recommends using average loudness because it prevents those sudden volume jumps that make listeners reach for the dial.. According to the Audio Engineering Society, maintaining consistent loudness improves audio clarity and listener comfort.
Why Inconsistent Audio Kills Your Content
Good video matters, but bad audio will kill your views instantly. Here is why:
Algorithmic crushing: YouTube and Spotify have their own built-in volume limits. If your file is way too loud, their systems will aggressively turn it down, which can make your audio sound flat and muddy. On the flip side, if it’s too quiet, the platform will boost it, which brings up the background noise and makes it sound terrible. Normalizing first ensures it sounds exactly how you want it to.
Listener fatigue is real: If people have to keep adjusting their volume, their ears get tired. They’ll stop listening just to get some peace. A steady, balanced track lets them actually relax and focus on what you’re saying.
It looks sloppy: Unbalanced audio makes your content feel amateurish, even if your information is gold. It suggests you didn’t bother to check your files before uploading.
How Do You Normalize Audio Levels?
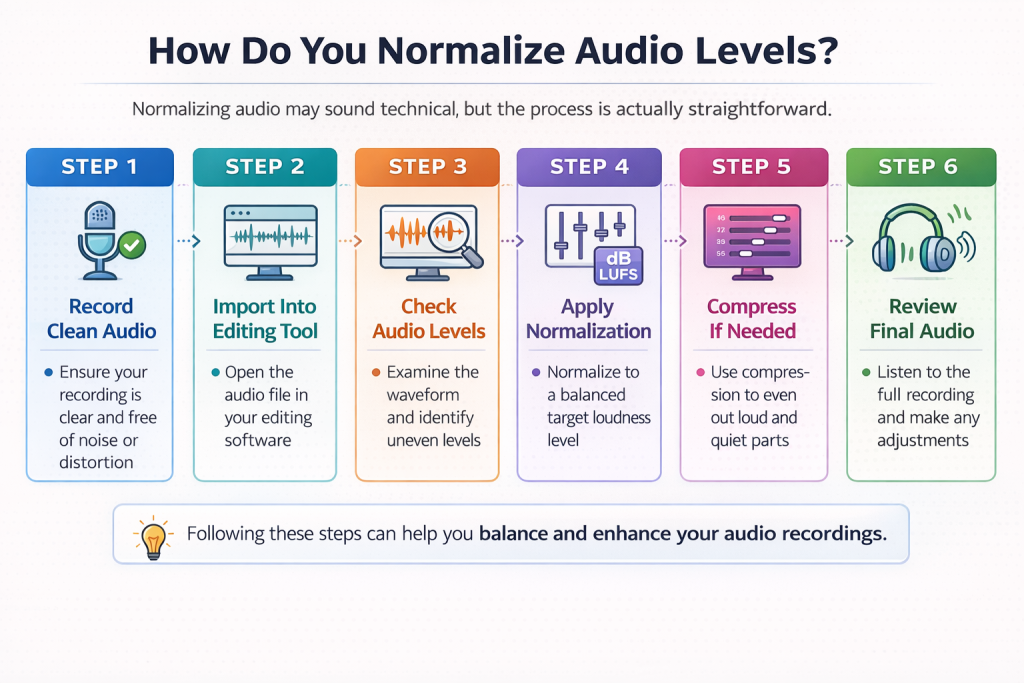
You don’t need to be a sound designer to fix this. Most free and paid editors can handle it in a couple of clicks.
Step 1: Start with a Clean Recording
Normalization isn’t magic. If your track has a lot of background hiss, keyboard clatter, or air conditioning hum, boosting the volume will make those noises louder too. Record in a quiet room, get close to the mic, and make sure your meters aren’t hitting the red zone.
Step 2: Toss the File into Your Editor
Open your file in an audio program. For beginners, Audacity is a great, free starting point. When the file loads, you’ll see the blue squiggly lines of your waveform. The big spikes are the loud moments, and the flat lines are the quiet parts.

Step 3: Hunt Down Extreme Spikes
Before you hit normalize, look at the waveform. If you coughed, bumped the table, popped your P’s (plosives), or clapped near the mic, you’ll see a massive spike that towers over the rest of the track. If you leave that spike there, the software won’t be able to boost the rest of your quiet dialogue because it thinks the track is already loud enough. Highlight that spike and lower it manually first.
Step 4: Apply the Normalization Effect
Select your entire track, find the “Normalize” option in your effects menu, and apply it. You’ll need to set a target:
- -1 dB for peak normalization (this keeps it from clipping).
- -16 LUFS for podcasts.
- -14 LUFS for online video.
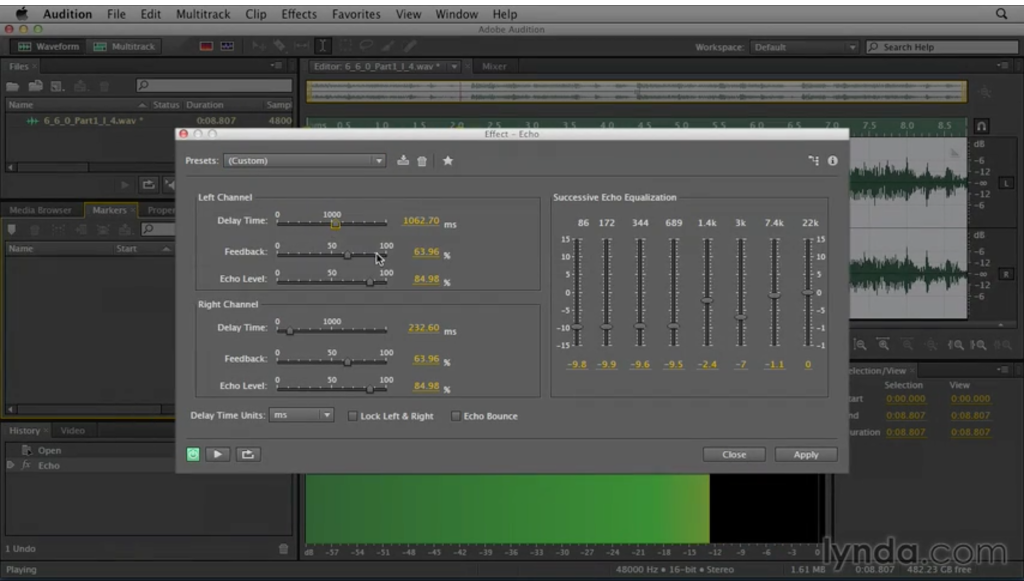
If you’re using professional software like Adobe Audition, you can use the Match Loudness panel to handle this automatically across multiple files.
Step 5: Add Compression if Things Are Still Uneven
If you have one person speaking loudly and another whispering, normalization won’t fix the difference between them—it just raises the volume of the whole track. To balance two different voices, apply a compressor. A compressor acts like an automated sound guy sitting at a mixing board with his hand on the volume slider, pulling it down when you yell and pushing it up when you whisper. It tames the loud parts and lifts the quiet parts so they sound like they’re in the same room.
Step 6: Listen to the Whole Thing
Never export a file blindly. Put on headphones and check a few different sections. Make sure the background noise isn’t too obvious, the voices are clear, and the music transitions don’t sound jarring.
What Mistakes Should You Avoid When Normalizing Audio?
Even though normalization is simple, a few common mistakes can affect audio quality.
- Normalizing before clean-up: Run your noise reduction before you normalize. Otherwise, you’re just making the noise louder.
- Setting the target too high: Keep your peak target around -1 dB or -2 dB. If you set it to 0 dB, you risk clipping, which sounds like static.
- Ignoring massive volume gaps: Normalizing won’t fix a track where one person is yelling and the other is whispering. You’ll need to run a compressor first.
- Normalizing mixed tracks: If you have music, background effects, and voices, do not normalize the final mix first. Normalize your vocal tracks individually before you mix them with music, otherwise the balance will be completely thrown off.
Avoiding these mistakes will produce cleaner and more professional audio.
Helpful Tips for Consistent Audio
If you regularly record audio content, these simple habits can help maintain consistent sound quality.
- Keep your distance: Stay about four to six inches from the mic. Moving around creates natural volume swings that are hard to fix in editing.
- Watch the meters: When recording, aim for your levels to bounce around -12 dB to -6 dB. This leaves you plenty of room to edit.
- Grab a pop filter: A cheap pop filter stops those harsh breath blasts from clipping your audio.
These small adjustments make editing easier and improve the final audio.
Final Thoughts
Consistent volume is the foundation of good audio. Spending a few extra minutes normalizing your tracks keeps your audience focused on your content instead of fighting the volume slider. Pick a tool, get used to the workflow, and make it a standard part of your post-production checklist. Your audience will thank you.



Leave a Comment